As a WordPress Developer, I recommend using the Phlox theme for your website. It is a versatile and feature-rich theme that offers a wide range of customization options.
In this article, I will walk you through installing and setting up the Phlox theme on your WordPress website.
Easy Ways To Install Phlox Theme In WordPress
Step 1: Downloading and Installing the Phlox Theme
The first step is downloading the Phlox theme from the WordPress theme repository or the Phlox website.
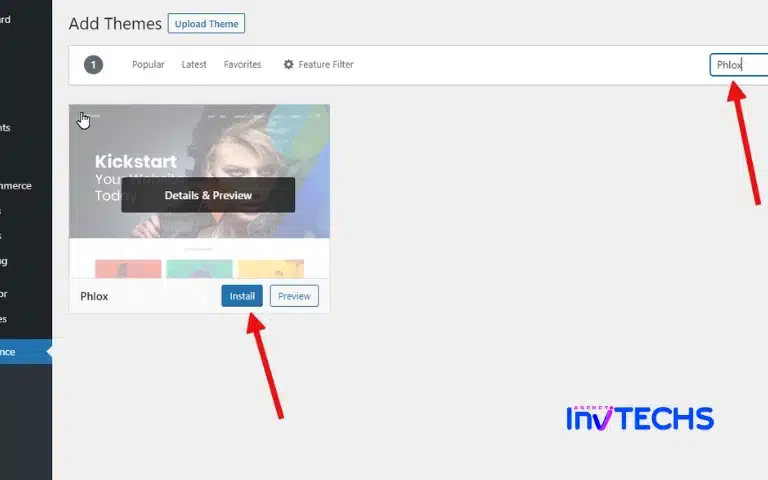
Once you have the theme file, log in to your WordPress dashboard and navigate to Appearance > Themes. Click on the "Add New" button and then click on the "Upload Theme" button. Select the Phlox theme file and click the "Install Now" button.
Once the theme is installed, click the "Activate" button to activate the Phlox theme on your website.
Step 2: Configuring the Phlox Theme Settings
Once the theme is activated, you'll be taken to the Phlox welcome page. You can access the theme settings from there by clicking on the "Customization" button.
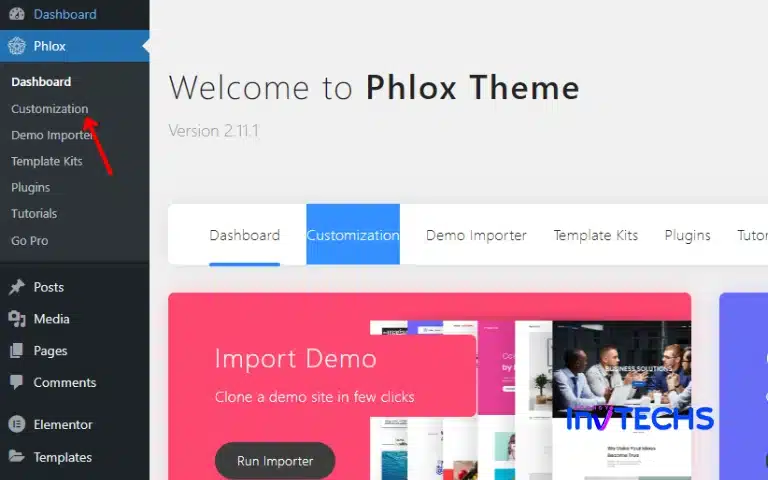
The Phlox theme options panel is organized into several tabs, each containing a specific set of options. We recommend going through each tab and adjusting the settings to your liking.
The options include General Settings, Header Settings, Footer Settings, Blog Settings, Portfolio Settings, and many others.
Step 3: Installing and Activating the Required Plugins
Phlox is a feature-rich theme that requires a few plugins to work correctly. To install the required plugins, navigate to Appearance > Install Plugins.
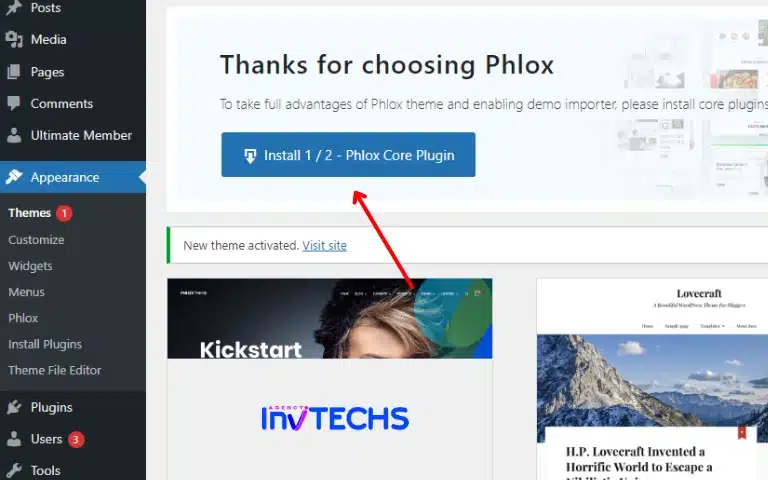
From there, you'll see a list of recommended plugins that should be installed and activated.
Click on the "Install" button next to each plugin, and once the installation is complete, click on the "Activate" button to activate the plugins.
Step 4: Importing the Phlox Demos (Optional)
To jump-start your website's design process, import one of the many pre-built Phlox demos. To import a demo, navigate to Appearance > Phlox Demos.
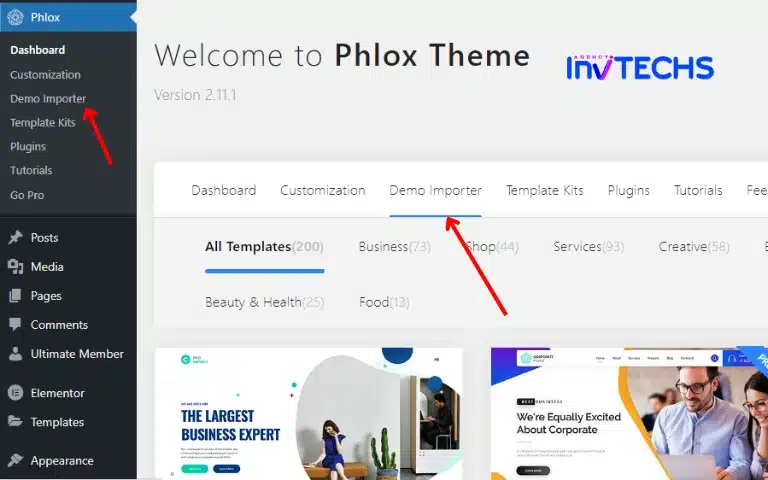
From there, you can choose the demo that best fits your needs and click the "Import" button. Depending on the demo site, the import process may take a few minutes.
Step 5: Customizing Your Website
You can start customizing your website with the Phlox theme and plugins installed and activated. You can do this by navigating to Appearance > Customize.
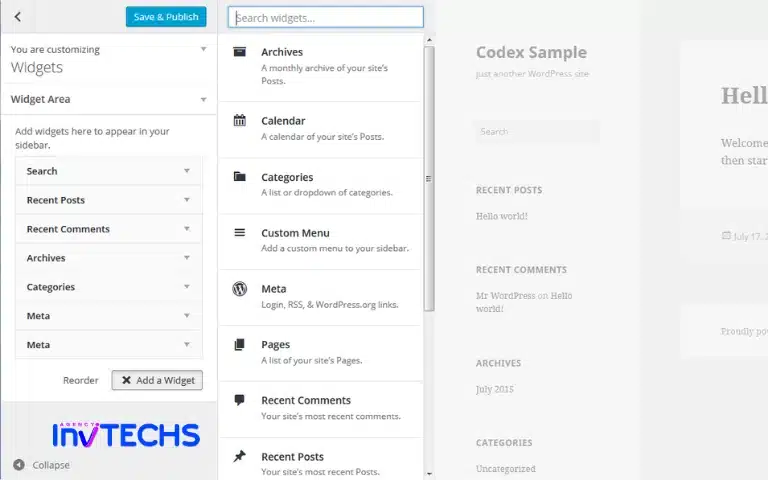
You can modify the theme's settings, including colors, fonts, layouts, etc.
The Phlox theme also includes a visual page builder, which allows you to create custom pages and layouts using drag-and-drop functionality.
FAQs about Install Phlox Theme In WordPress
The Phlox theme is accessible on the WordPress theme repository. However, there is a Pro version that offers additional features and functionality.
Yes, the Phlox theme is compatible with popular e-commerce plugins like WooCommerce and can be used for an e-commerce website.
You don’t need coding skills to use the Phlox theme. It has a visual page builder allows you to create custom pages and layouts using drag-and-drop functionality.
To import a theme into WordPress, log in to your WordPress dashboard first. Then, go to the Appearance section and click on the Themes option. You can click the Add New button to search for and upload a new theme.
First, log in to your WordPress dashboard to install the Phlox core plugin. Then, go to the Plugins section and click the Add New button. Next, type “Phlox” in the search bar, and the plugin should appear in the results. Click on the Install Now button, and once the installation is complete, click on the Activate button to enable the plugin.
To manually install a WordPress theme from a zip file, first, you need to download the theme’s zip file. Then, go to your WordPress dashboard, navigate to Appearance > Themes, click on the “Add New” button, and then click on the “Upload Theme” button. Select the zip file of the theme you downloaded and click the “Install Now” button. Once the theme is installed, click the “Activate” button to use it.
To install Phlox Core Elements, you can follow these steps:
- Log in to your WordPress dashboard.
- Go to the “Plugins” section on the left-hand side menu.
- Click “Add New” and search for “Phlox Core Elements” in the search bar.
- Once you find the plugin, click “Install” and “Activate.”
- After activation, you can access the plugin’s features by going to the “Phlox” menu on the left-hand side of your dashboard.
Final Thoughts
Phlox theme is an excellent choice for creating a professional and visually appealing website. Its versatile and feature-rich nature offers a wide range of customization options to help you make your website stand out.
Following the step-by-step guide outlined above, you can install and set up the Phlox theme on your WordPress website quickly.
If you have any questions or encounter issues during installation, don’t hesitate to contact our team for assistance. We’re always here to help you create the website of your dreams.